
To digitize old family photos at home, start with a small, clearly labeled batch. Use a flatbed scanner for loose prints that can lie safely on the glass, capture small prints at 600 ppi when practical, and save a high-quality master before making smaller JPEG copies for sharing. Scan the back when it contains writing, record who, where, and when, then keep three copies on two kinds of storage with one copy off-site. Keep the original photographs too.
The scan button is the easy part. The useful work is making files that another relative can identify and open years from now. Twenty-five finished photographs with names and backups beat a hard drive full of files called Scan_0047.
How to Digitize Old Family Photos at Home

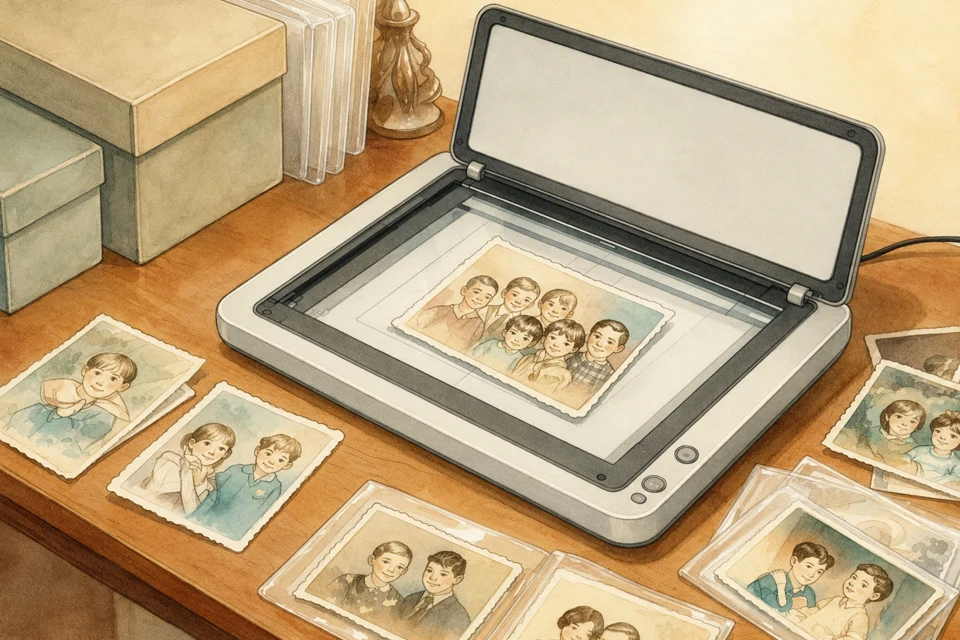
To digitize old family photos at home, start with a small, clearly labeled batch. Use a flatbed scanner for loose prints that can lie safely on the glass, capture small prints at 600 ppi when practical, and save a high-quality master before making smaller JPEG copies for sharing. Scan the back when it contains writing, record who, where, and when, then keep three copies on two kinds of storage with one copy off-site. Keep the original photographs too.
The scan button is the easy part. The useful work is making files that another relative can identify and open years from now. Twenty-five finished photographs with names and backups beat a hard drive full of files called Scan_0047.
Before you scan, decide what the copy is for
A scan made for a family group chat has a different job from a preservation master. Decide what you need before changing settings or buying equipment.
| Goal | Sensible starting point | What to keep |
|---|---|---|
| Quick sharing | A careful phone capture or 300 ppi scan, saved as a high-quality JPEG | The original plus the best unedited file |
| Family archive | A flatbed scan at 600 ppi for a typical small print, saved as TIFF when available | An untouched master and separate JPEG copies |
| Enlarging or restoring a small print | 600 ppi or higher if the scanner has true optical detail | The original scan before any cleanup |
| A bound album or fragile item | A camera or copy stand that does not force the page flat | A full-page view, detail images, and the original album |
These are home-project starting points, not universal archival specifications. The right setting depends on the print's size, condition, detail, and intended use. The 2023 Federal Agencies Digital Guidelines Initiative lists 400 ppi and 600 ppi tiers for prints and photographs, alongside color and equipment tests that a home scanner may not meet. More pixels alone do not rescue a poor capture.
If you only want to send Aunt Eva one picture tonight, use the phone. If the box contains the only known photograph of Eva's childhood home, slow down and make a master file.
1. Sort a small batch without losing its order
Choose one envelope, album section, person, or event. Keep the existing sequence until you know whether it carries meaning. Create the destination folder before scanning.
For example:
family-photos/
  kovacs-family/
    1974-vienna-visit/
      masters/
      sharing/
      1974-vienna-visit-index.csv
Work on a clean, dry table with no food or drinks. The Library of Congress advises handling photographs by their edges or housing and avoiding tape, sticky notes, glue, and rubber bands. Clean, dry hands give good control for paper prints; fitted nitrile gloves are useful for negatives, glass, and metal.
Do not start by peeling photographs from an album. If a print is stuck to a page or glass, cracked, flaking, curled, or separating from its mount, stop. Photograph it in place or ask a photograph conservator for advice. A perfect scan is not worth tearing the only original.
2. Pick the safest capture method
Use a flatbed scanner for loose, stable prints
A flatbed keeps the angle, focus, and lighting consistent. Make sure the whole print fits. Do not press a thick mount or overfilled album under the lid.
Avoid automatic document feeders for old photographs. The US National Archives warns that fragile, bent, weak, or valuable papers can jam and tear in a feeder. A fast roller scanner may be fine for modern duplicate prints in good condition, but it should not be the default for irreplaceable material.
Slides and negatives need a scanner with a film holder and transmitted light, or a specialist digitization service. Do not put them through a document feeder or assume an ordinary reflective flatbed will capture them properly.
Use a camera for albums and items that should not lie flat
A phone or camera is safer when a book cannot open comfortably on scanner glass. Support the album, keep the lens parallel to the page, use even indirect light, and switch off the flash if it creates glare. Include the page edges in one reference image before moving closer.
The National Archives recommends a copy stand and supports for bound material rather than forcing a binding flat. If the camera app applies filters, portrait blur, or automatic "enhancement," turn them off when possible. Keep the uncropped capture as the master.
3. Choose settings you can explain later
For a typical small family print, 600 ppi is a practical preservation setting when storage and time allow it. For a large print reproduced at its original size, 300 to 400 ppi may capture enough detail. Older FADGI guidance describes 300 ppi at original size as a minimum for reproducing a photograph well at that size; current professional tiers go higher.
Use the scanner's optical resolution. A setting labeled "enhanced," "interpolated," or "upscaled" invents pixels after capture. It creates a larger file without recovering missing detail.
Scan sepia prints and photographs with colored marks in color. Grayscale can suit a neutral black-and-white print, while color also records paper tone, stains, and annotations. If unsure, test both and inspect faces, shadows, and handwriting at 100% view.
Turn off automatic dust removal, sharpening, and color restoration for the first master unless you understand what the software changes. Edit a copy. The untouched scan is the file you can return to when an automated correction gets skin, clothing, or background detail wrong.
4. Save a master and a sharing copy
TIFF can store the captured image without JPEG's lossy compression. The Library of Congress recommends a TIFF master and a JPEG working copy. JPEG is smaller and easier to send, but repeated saving after edits can discard more image data.
If your scanner only produces JPEG, choose its highest quality setting and keep the first unedited file. A well-made JPEG with names and backups is far better than a theoretical TIFF project that never starts.
Use separate folders so nobody accidentally edits the master:
masters/1974-vienna-anna-eva-001-front.tif
masters/1974-vienna-anna-eva-001-back.tif
sharing/1974-vienna-anna-eva-001.jpg
Scan the back when it has a date, studio stamp, handwriting, album position, or uncertain name. Pair front and back under the same identifier. Keep borders, mounts, and captions in the master; they may help identify the image later.
5. Name the people, place, date, and source
The National Archives recommends basic metadata answering who, what, where, and when. Put what you know in a simple index rather than cramming every detail into a filename.
Useful columns are:
- File ID
- People shown, from left to right
- Place
- Date or estimated range
- Event or activity
- Who supplied the photograph
- Words written on the back
- Privacy or sharing restrictions
- Notes and unresolved questions
Record uncertainty honestly: 1973-or-1974, before the Vienna move is better than choosing 1974 for a tidy folder. Ask relatives while the photograph is in front of them. One may recognize a face; another may remember the bicycle.
Keep filenames short and consistent, using letters, numbers, hyphens, and underscores. If names contain accents, preserve the correct spelling in the index even if you use an ASCII-safe filename for compatibility.
6. Check each batch before putting it away
Open every master. Confirm that it is correctly oriented, in focus, and fully captured. Check dark clothing, pale skies, faces, and writing at 100%. Make sure front and back have not been swapped.
Then compare the folder with the physical batch:
- Does every selected photograph have a master?
- Does every written back have a paired image?
- Can a relative identify each file from the name and index?
- Does at least one other person know where the archive is?
Then return the batch to cool, relatively dry, stable storage away from attics, basements, leaks, and direct light. Use photo-safe sleeves, folders, boxes, or corners rather than self-adhesive "magnetic" albums.
7. Back up the archive before you start the next box
Follow the National Archives' 3-2-1 rule: three copies on two kinds of storage, with one off-site. That might mean a computer, an external drive, and an off-site copy in a reputable cloud account or at a relative's home.
Sync is convenient, but a mistaken deletion can synchronize too. Check that the other copies open, and review the archive as drives, accounts, and formats change.
Keep the physical originals. Digitization reduces handling and makes sharing easier, but the National Archives notes that digital copies can be lost too. Store the originals safely and use the JPEGs for everyday viewing.
Turn a labeled photo group into a story
Once the files have names and context, choose five to ten linked by one afternoon, journey, home, or relationship. Ask what happened before the first image, what the camera missed, and what changed after the last one.
Keep that account beside the masters. Then decide how relatives will use it. A photo book can keep the actual photographs at the center. An illustrated storybook can retell one episode for a child, including moments nobody photographed, as long as the family can tell what is remembered and what was invented. The photo book, memory book, and storybook comparison helps separate those jobs.
If the chosen sequence has a moment the camera missed, such as the bus ride or joke before the first picture, Storique can turn the photos and your account into an illustrated draft for review. Keep it as a retelling beside the archive, not in place of it. The photo-selection checklist helps choose references; the storybook creation guide covers the rest of the process.
For the wider archive, use the family-story preservation guide to add interviews, transcripts, documents, and permissions without losing track of the original sources.
Frequently asked questions
What is the best resolution for scanning old photos?
For a typical small print, 600 ppi is a practical starting point for a high-quality master. A large print reproduced at the same size may need only 300 to 400 ppi. Use true optical resolution, inspect a test at 100%, and choose the setting based on the print's size, detail, and intended use.
Is TIFF or JPEG better for old photos?
Use TIFF for an unedited preservation master when your scanner supports it. Make high-quality JPEG copies for phones, email, websites, and family sharing. If JPEG is your only option, keep the first high-quality file untouched and edit a copy.
Can I digitize family photos with a phone?
Yes. A phone can make a useful copy and may be safer for a bound album that should not be flattened. Keep the camera parallel, use even light, avoid glare and automatic filters, and include the whole item. A flatbed scanner is usually more consistent for loose, stable prints.
Should I scan the back of every photograph?
Scan any back that contains writing, dates, studio marks, album numbers, or other clues. Use the same file ID with front and back labels. For blank backs, your index can simply record that you checked them.
Can I throw away the originals after scanning?
No. Keep the originals in safe physical storage. Digital files can be deleted, corrupted, locked in an account, or lost when hardware fails. Scans make access easier; they do not make the source disposable.
Sources
- Digitizing Family Papers and Photographs, US National Archives
- Care, Handling and Storage of Photographs, Library of Congress
- Preservation Guidelines for Digitizing Library Materials, Library of Congress
- Personal Digital Archiving: The Basics of Scanning, Library of Congress
- Technical Guidelines for Digitizing Cultural Heritage Materials, 2016, Federal Agencies Digital Guidelines Initiative
- Technical Guidelines for Digitizing Cultural Heritage Materials, Third Edition, Federal Agencies Digital Guidelines Initiative
A little story magic, delivered.
New free stories, thoughtful gift ideas, and occasional Storique news — one lovely email at a time.
- Free stories
- Gift ideas
- Storique news